AWS EC2 Automation

☁️What is Amazon EC2?
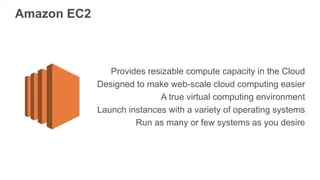
Amazon Elastic Compute Cloud, often referred to as Amazon EC2, is like a virtual computer in the cloud. It allows you to rent these virtual computers, known as instances, on-demand. These instances can run various operating systems and software, providing you with the computing power you need without having to own or manage physical hardware.
☁️Why is Amazon EC2 Useful?
Amazon EC2 is beneficial because it offers:
Security: It runs on Amazon's secure infrastructure, helping to protect your data.
Reliability: EC2 instances are highly reliable, with built-in features for fault tolerance.
Performance: You can choose the instance type that suits your needs, from basic to high-performance options.
Cost-Effectiveness: You only pay for what you use, making it cost-effective for businesses of all sizes.
☁️Automation in Amazon EC2:
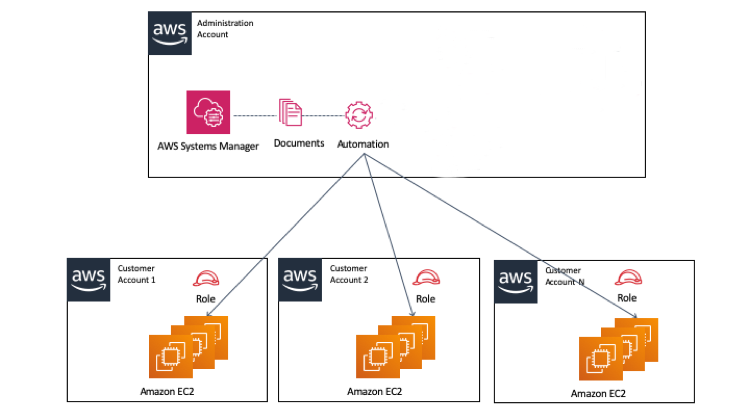
Automation in EC2 means making the process of managing and using these virtual computers more efficient and less manual. Here are some key points about automation:
Launching Instances: Instead of manually setting up instances one by one, you can create scripts or use tools to automatically launch multiple instances at once. This is helpful for quickly scaling your computing resources.
Configuration Management: You can automate the setup and configuration of your instances, ensuring they have the right software, settings, and security measures in place as soon as they are launched.
Scaling: With automation, you can set rules to automatically add or remove instances based on your application's demand. For example, you can add more instances during peak hours and scale down when traffic decreases.
Monitoring and Alerts: Automation allows you to set up monitoring for your instances and receive alerts when something goes wrong. This helps you respond to issues promptly.
Backup and Restore: You can automate the process of creating backups of your instances and restoring them if needed. This ensures data safety and recovery.
Patch Management: Automation helps in applying security patches and updates to your instances without manual intervention, reducing vulnerabilities.
Load Balancing: Automation can manage the distribution of incoming traffic across multiple instances, ensuring even distribution and high availability.
☁️Launch Template in AWS EC2:
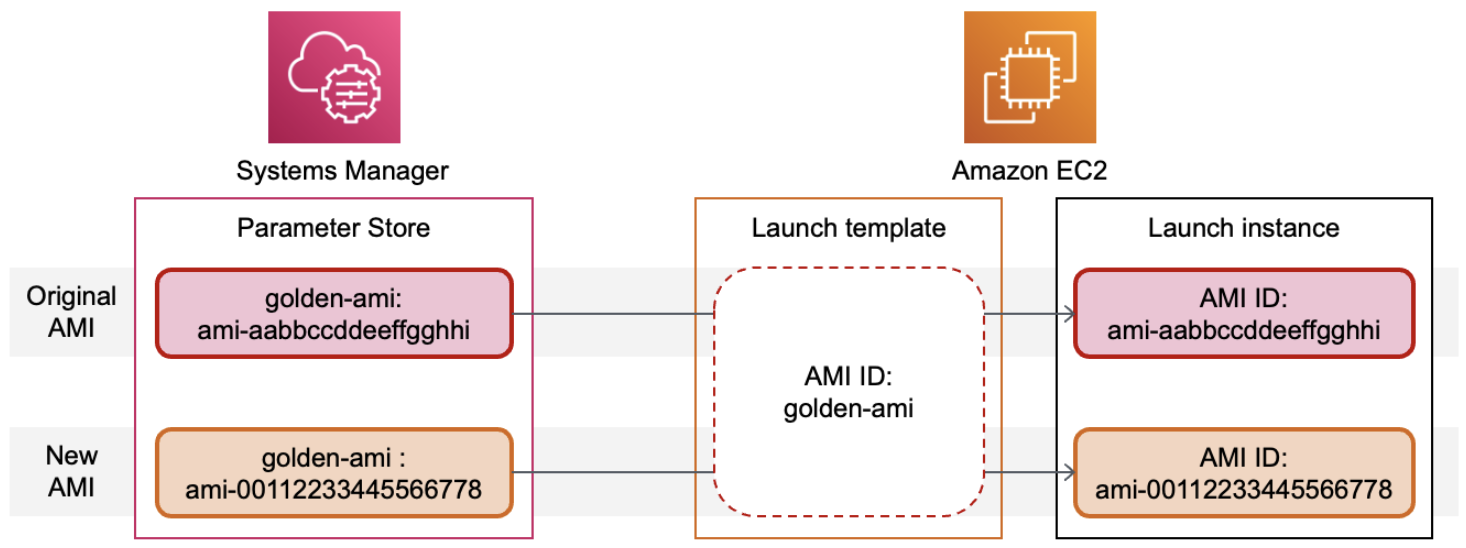
A launch template in Amazon EC2 is like a blueprint for creating virtual machines (instances) in the cloud. Think of it as a preset recipe that includes all the essential ingredients and instructions needed to cook a specific dish. In this case, the "dish" is your EC2 instance.
Here's why launch templates are useful:
Configuration Convenience: Instead of manually specifying all the details (like the type of instance, network settings, and more) every time you want to create a new EC2 instance, you can create a launch template that contains these settings. It's like having a template with your favorite pizza toppings ready to go, so you don't have to customize your order each time.
Consistency: Launch templates ensure consistency in your instance configurations. You can use the same template to create multiple instances with identical settings. This is helpful when you need a group of instances that should behave the same way.
Efficiency: Using launch templates saves you time and reduces the chances of errors. You don't need to remember or manually input all the details; you just select the appropriate template.
Updates: If you need to make changes to your instance configuration, you can update the launch template, and those changes will apply to all instances created from that template.
☁️Instance Types in Amazon EC2:
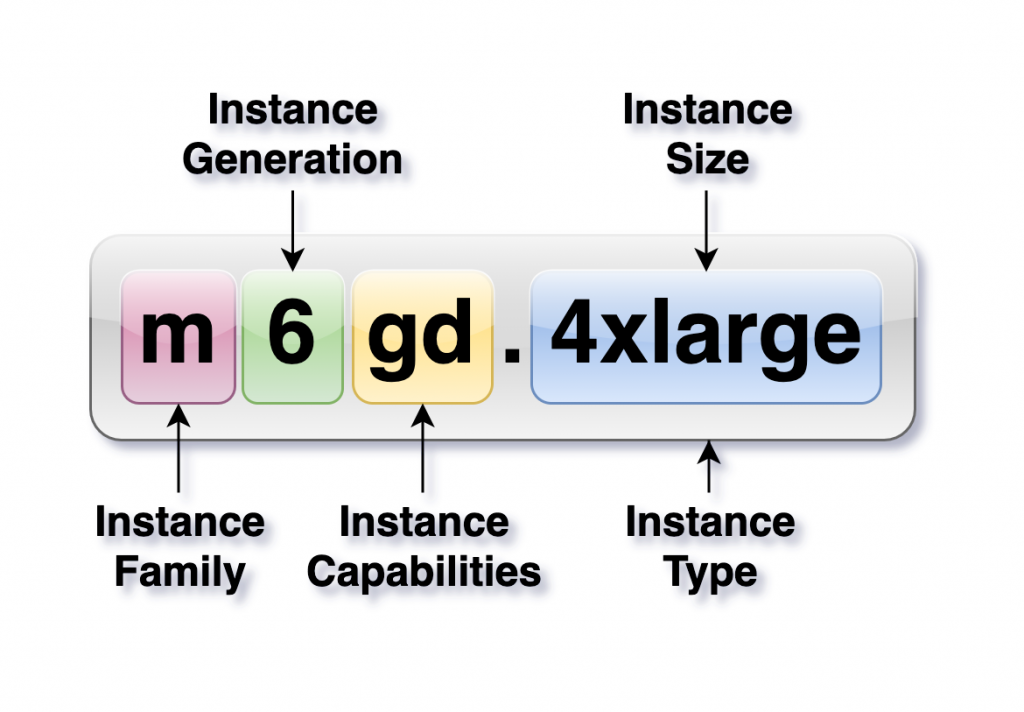
Amazon EC2 offers a variety of virtual machine sizes known as "instance types." Think of instance types as different models of cars, each with its own set of features and capabilities. The key components that vary among instance types include:
CPU: The processing power, which can range from basic to high-performance CPUs.
Memory: The amount of RAM available for running applications.
Storage: The type and amount of storage (e.g., SSD or HDD) that comes with the instance.
Networking: The network bandwidth and capabilities, which determine how fast data can be transferred in and out of the instance.
Instance types are designed to meet various workload needs, from simple web hosting to data-intensive applications. Choosing the right instance type ensures your application runs efficiently and cost-effectively.
☁️AMI (Amazon Machine Image):
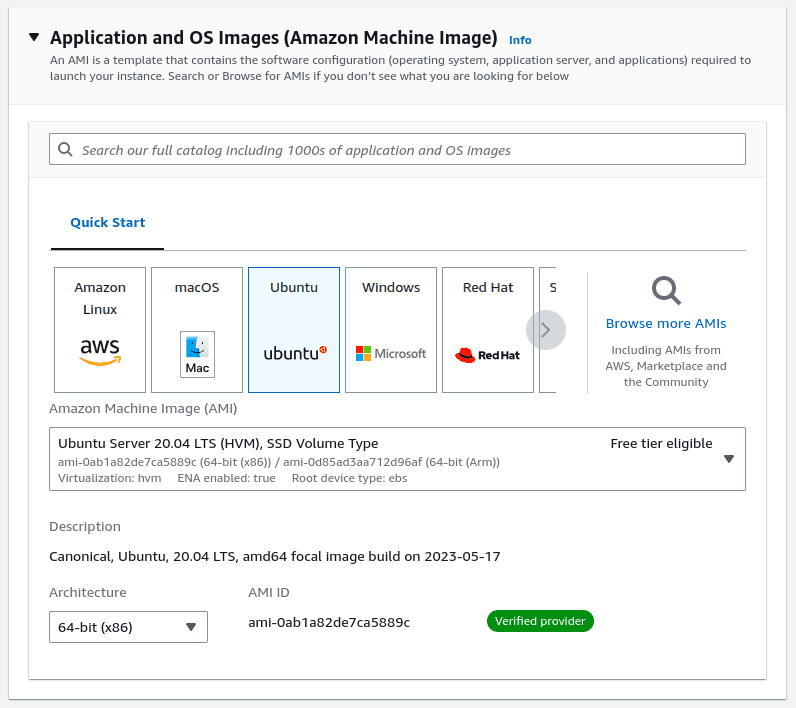
An Amazon Machine Image (AMI) is like a pre-configured template for an EC2 instance. It's a snapshot of an instance's operating system, software, and any data you want to include. Think of it as a ready-made cake mix with all the ingredients and instructions. When you launch an EC2 instance, you select an AMI to define the initial state of your virtual machine.
Key points about AMIs:
Variety: AWS provides a range of AMIs, including different operating systems (e.g., Linux, Windows), software stacks, and configurations.
Customization: You can create your own custom AMIs with your preferred software and settings, making it easier to replicate your environment.
Scalability: AMIs are useful when you need multiple instances with the same setup, allowing you to scale your application easily.
☁️Hands-On Practice
Task: Setting Up Amazon EC2 Instances with Jenkins and Docker Using Launch Templates and Auto-Scaling (Optional)
🕸️ Creating a Launch Template:
Log into AWS Console: Go to the AWS website and sign in with your AWS account credentials.
Access the EC2 Dashboard:
Click on "Services" at the top-left corner of the AWS Console.
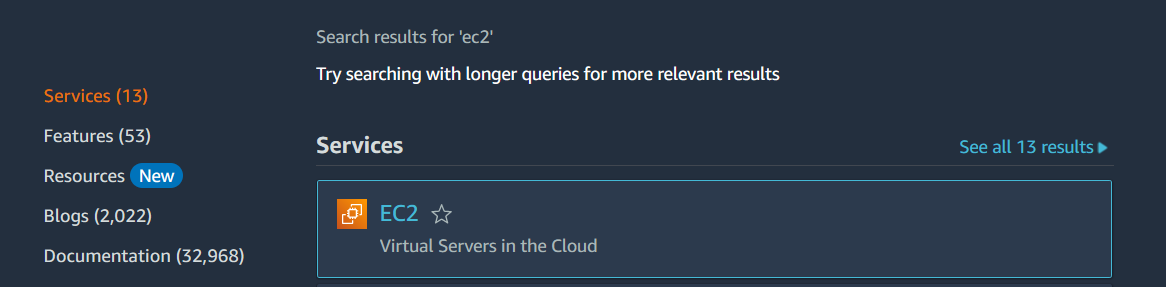
Under the "Compute" section, select "EC2" to enter the EC2 Dashboard.
Create a Launch Template:
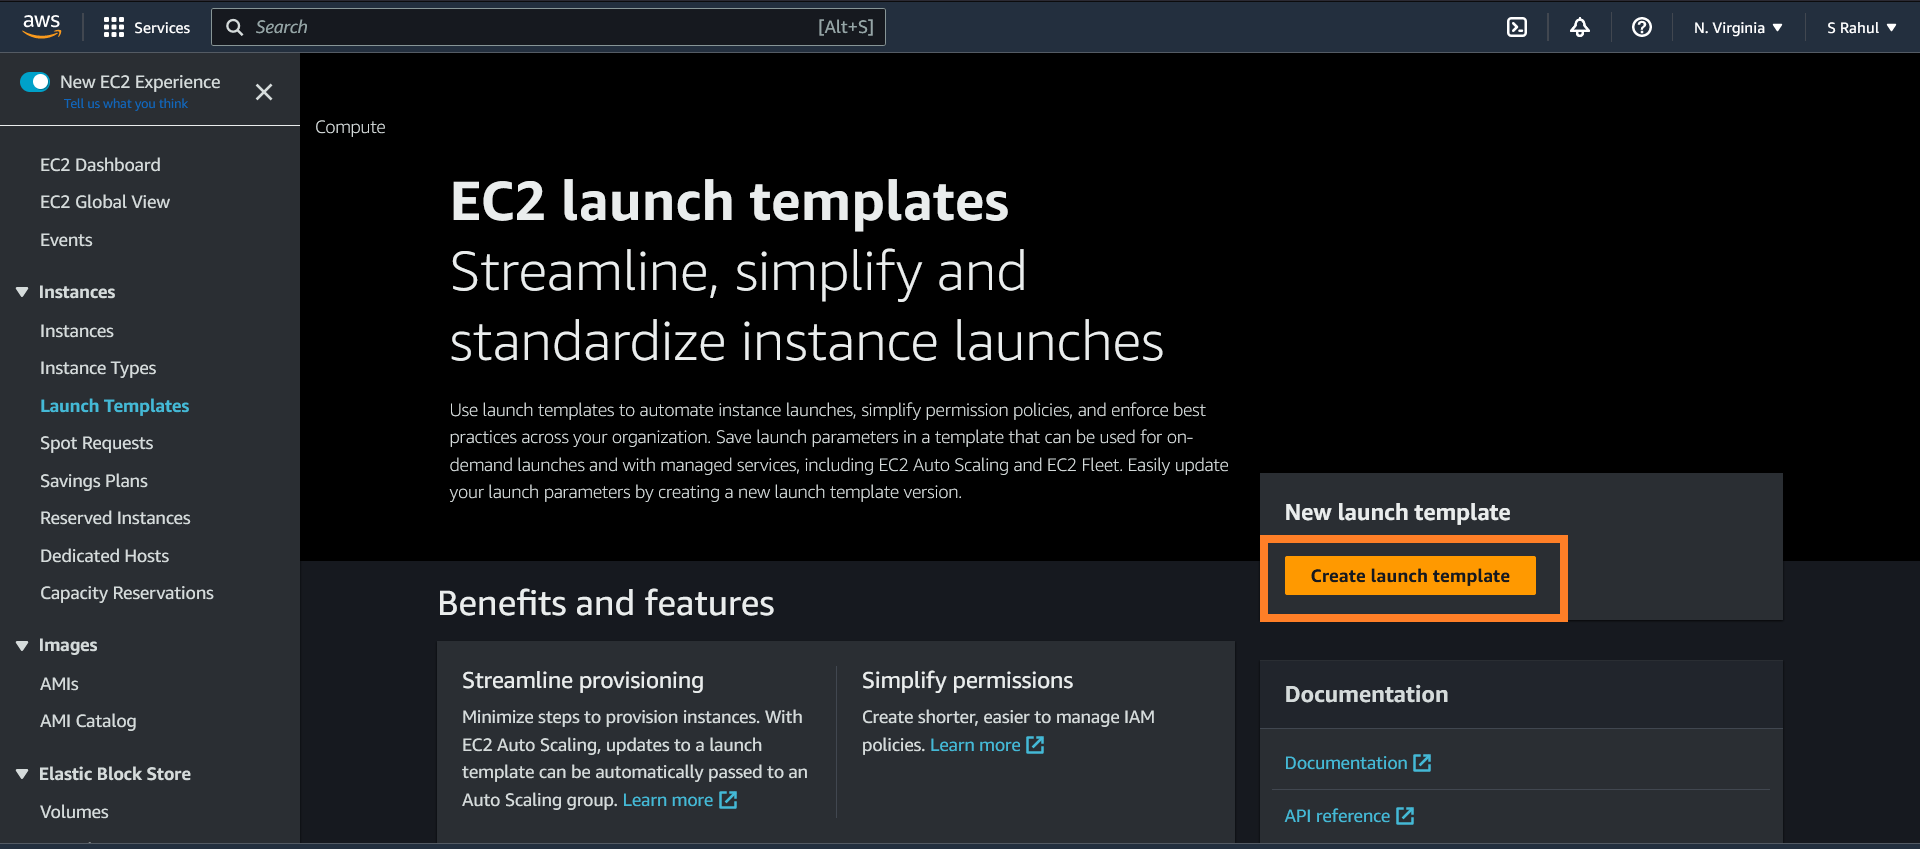
In the EC2 Dashboard, find the "Instances" section on the left sidebar and click on "Launch Templates."
Click the "Create launch template" button.
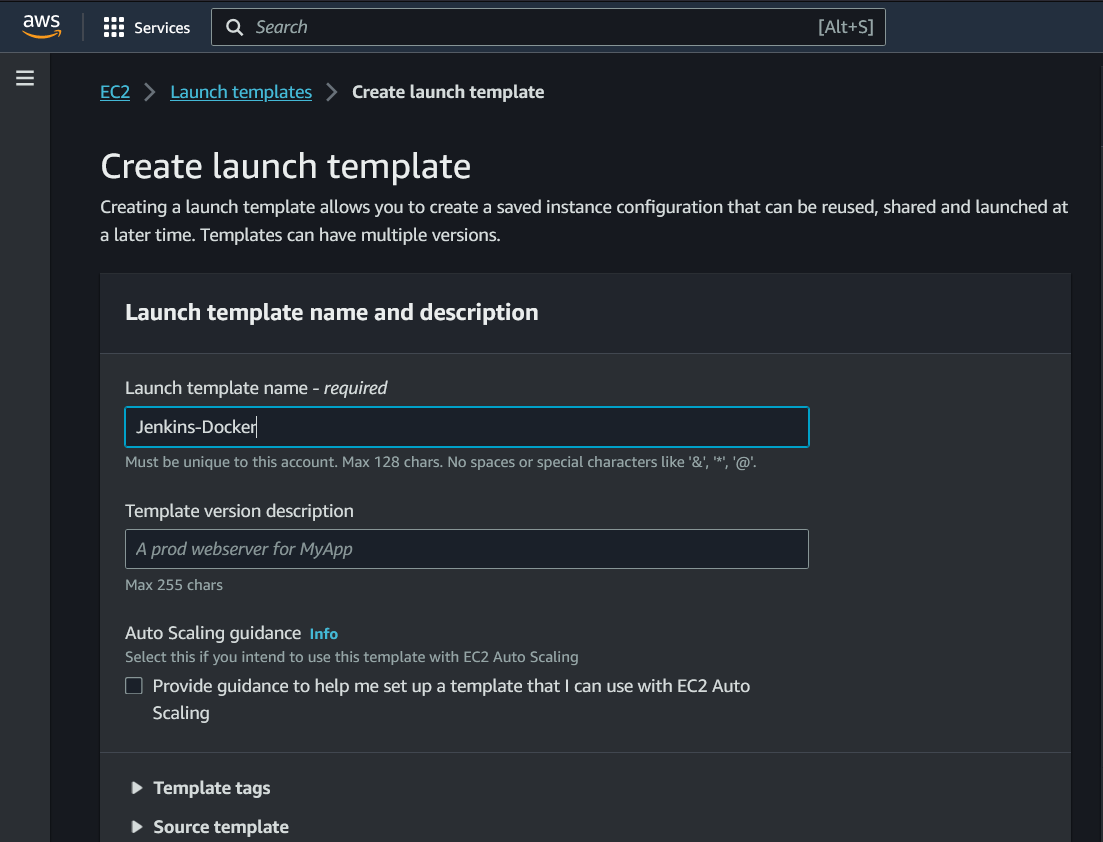
Basic Configuration:
Give your launch template a name, like "Jenkins-Docker."
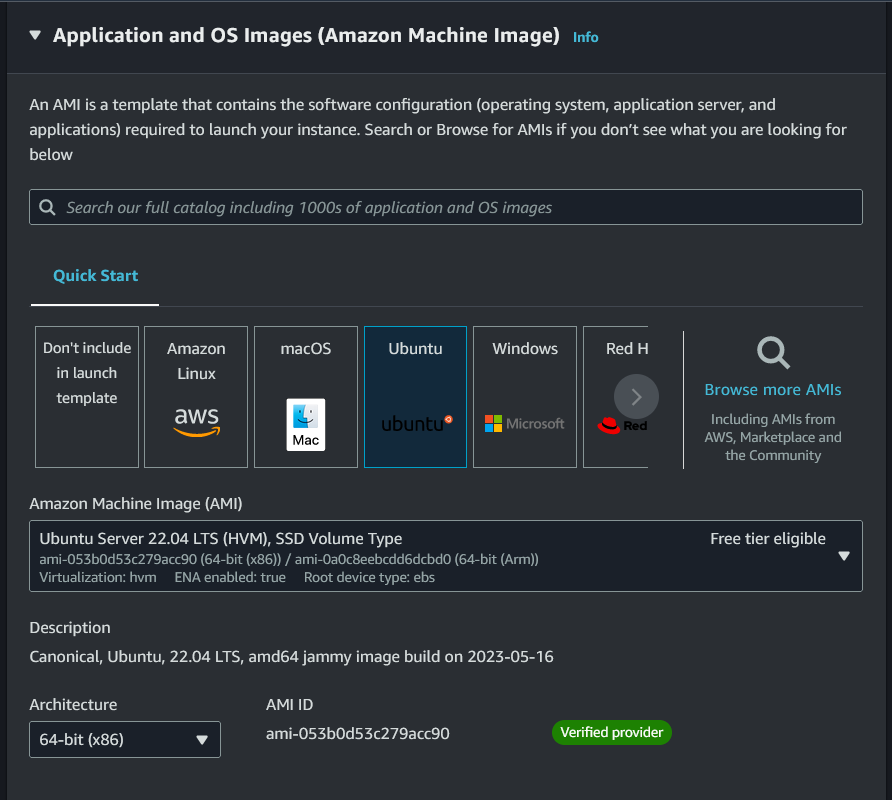
For "AMI ID," search and select "Amazon Linux 2 / Ubuntu" from the list.
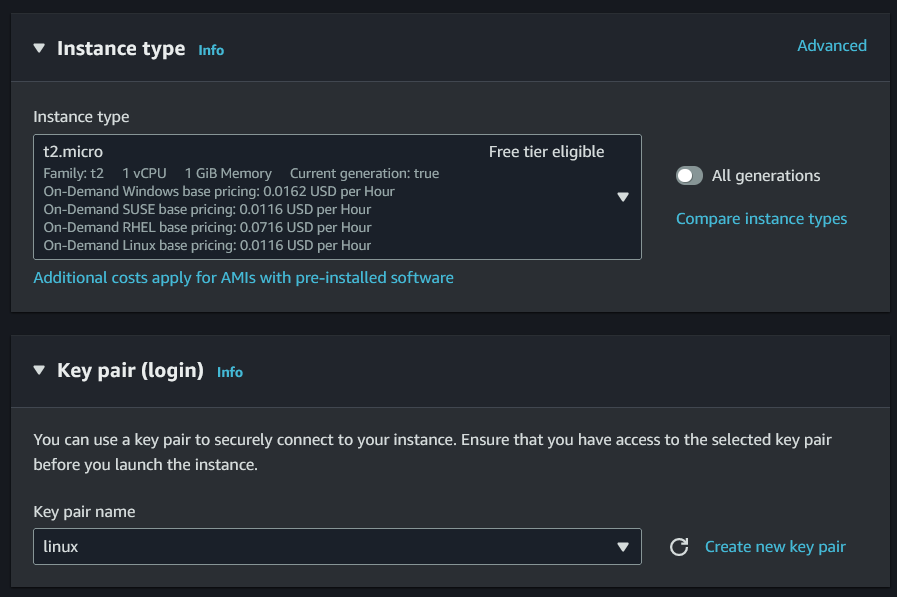
In the "Instance type" section, choose "t2.micro."
Choose a key Pair
Select an existing key pair or create a new one to securely access your instances.
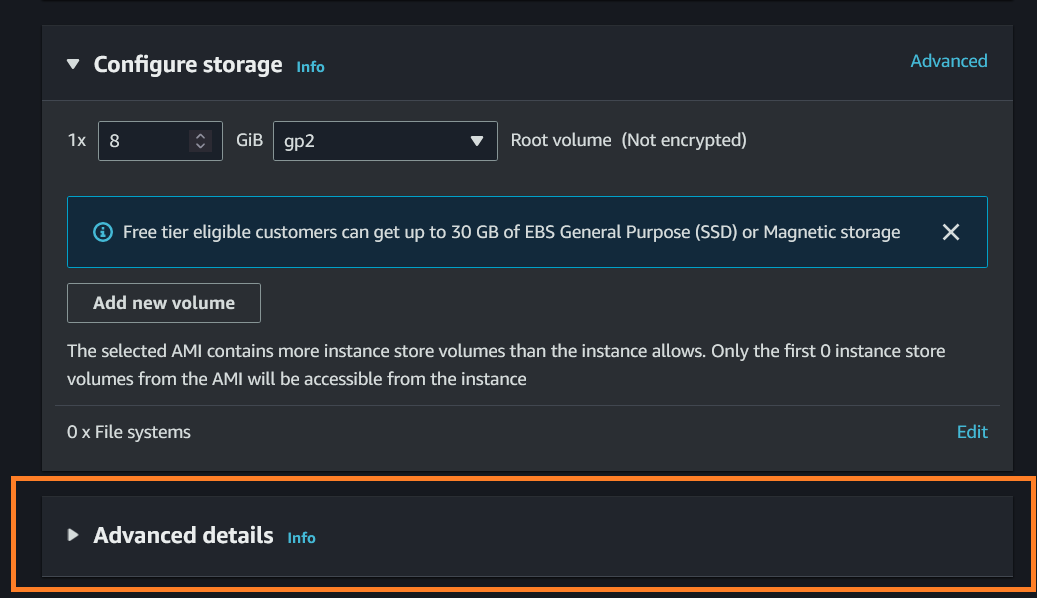
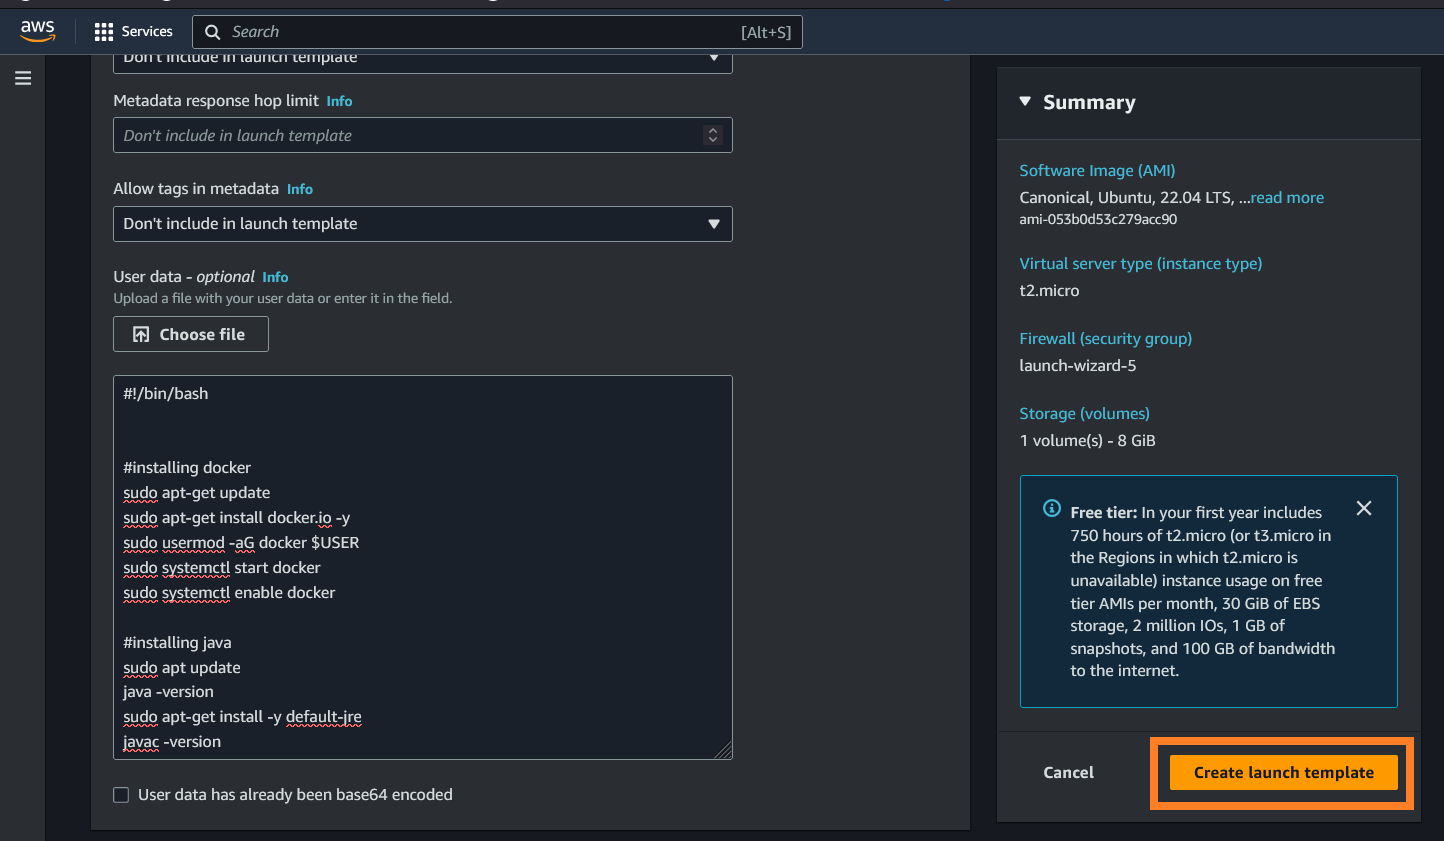
Advanced Details (User Data Script):
Scroll down to the "Advanced Details" section.
In the "User data" field, paste the user data script provided earlier. This script installs Jenkins and Docker.
  #!/bin/bash

  #installing docker
  sudo apt-get update
  sudo apt-get install docker.io -y
  sudo usermod -aG docker $USER
  sudo systemctl start docker
  sudo systemctl enable docker

  #installing java
  sudo apt update
  java -version
  sudo apt-get install -y default-jre
  javac -version

  #installing jenkins
  curl -fsSL https://pkg.jenkins.io/debian-stable/jenkins.io-2023.key | sudo tee \
              /usr/share/keyrings/jenkins-keyring.asc > /dev/null
  echo deb [signed-by=/usr/share/keyrings/jenkins-keyring.asc] \
              https://pkg.jenkins.io/debian-stable binary/ | sudo tee \
                  /etc/apt/sources.list.d/jenkins.list > /dev/null
  sudo apt update
  sudo apt-get install -y jenkins
  sudo systemctl start jenkins.service
  sudo systemctl enable jenkins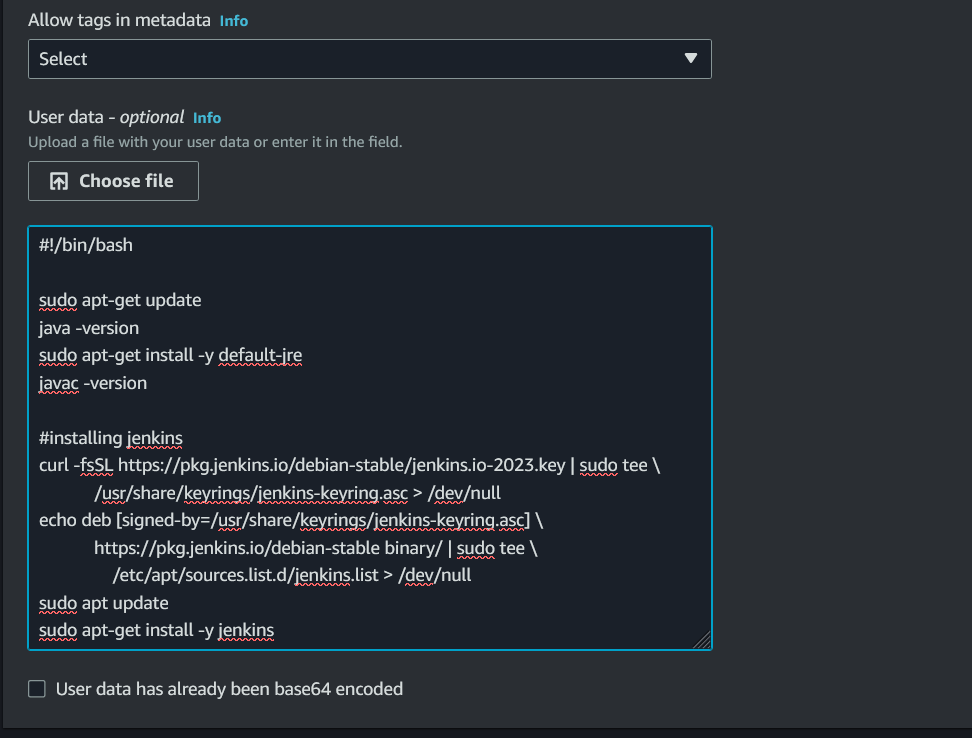
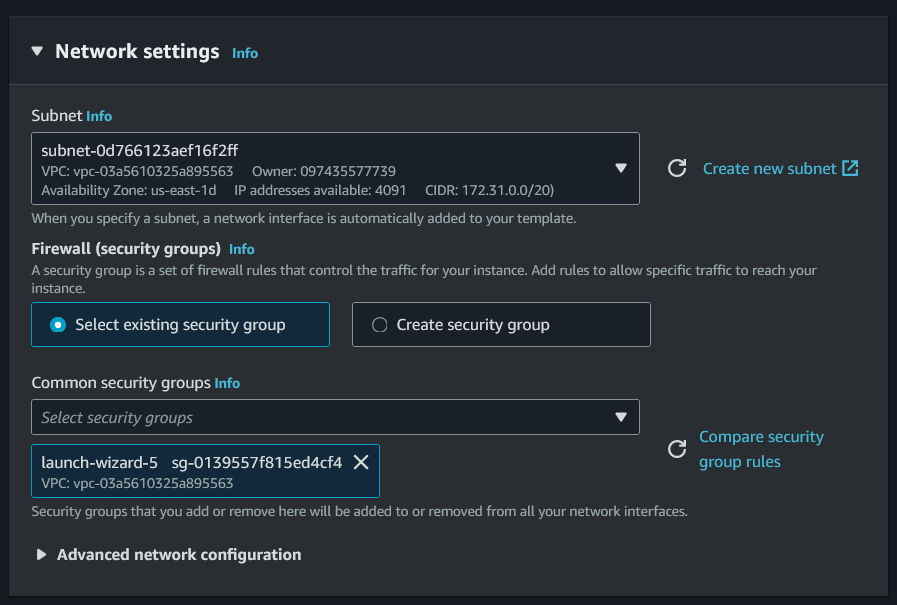
Networking and Storage:
Configure networking and storage settings based on your application's needs. You can keep the default settings if you're unsure.
Select the subnet and security group in which we have given the permission for port 8080 .
Tags:
- Optionally, you can add tags to your launch template to help with organization.
Create Launch Template:
Review your settings to ensure they are correct.
Click the "Create launch template" button to save your template.

🕸️ Launching Instances Using the Launch Template:
Navigate to Instances:
Go back to the EC2 Dashboard by clicking "Services" and selecting "EC2."
Under the "Instances" section on the left sidebar, click on "Instances."
Launch Instances:
- Click the "Launch instances" button.
Select Launch Template:
In the instance launch wizard, choose "My launch templates."
Select the launch template you created earlier.

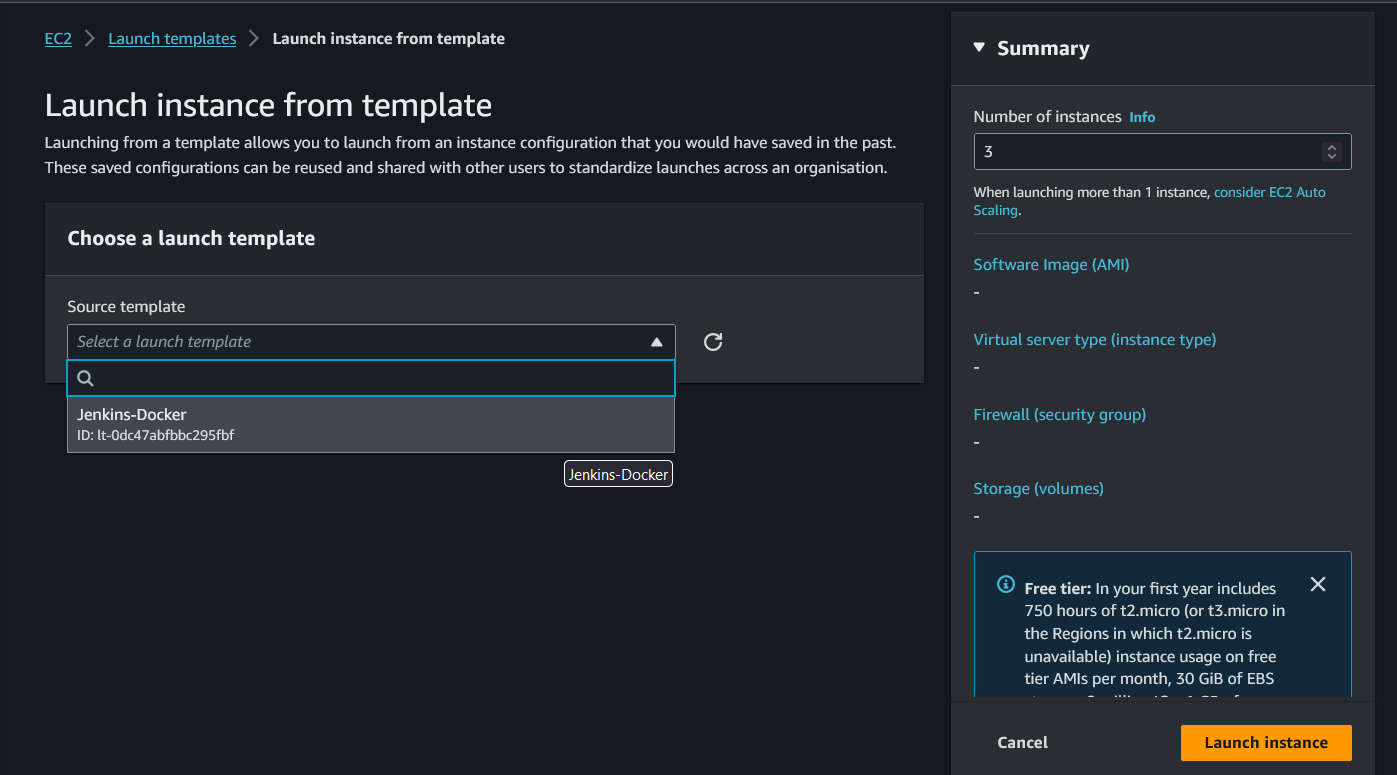
Specify the Number of Instances:
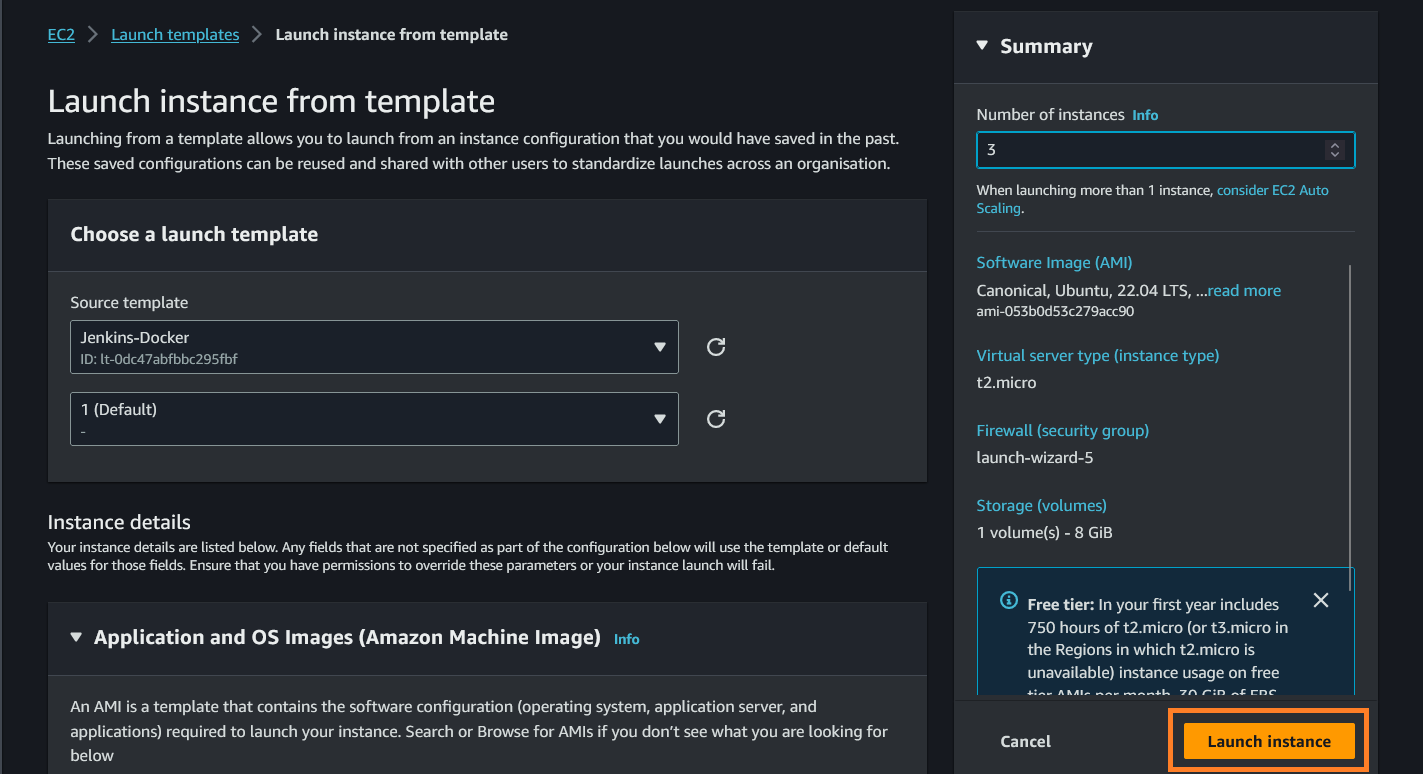
- Look for an option labelled "Number of instances" and enter "3" to specify that you want to launch three instances.
Configure Other Details:
- Continue through the launch wizard, setting up networking, storage, security groups, and other details as needed for your application.
Launch Instances:
Review your instance configurations to make sure they are correct.
Finally, click the "Launch instances" button to create and launch your three instances using the launch template.

🕸️ Creating Auto-Scaling Group
Step 1: Prepare Your Launch Template or Configuration:
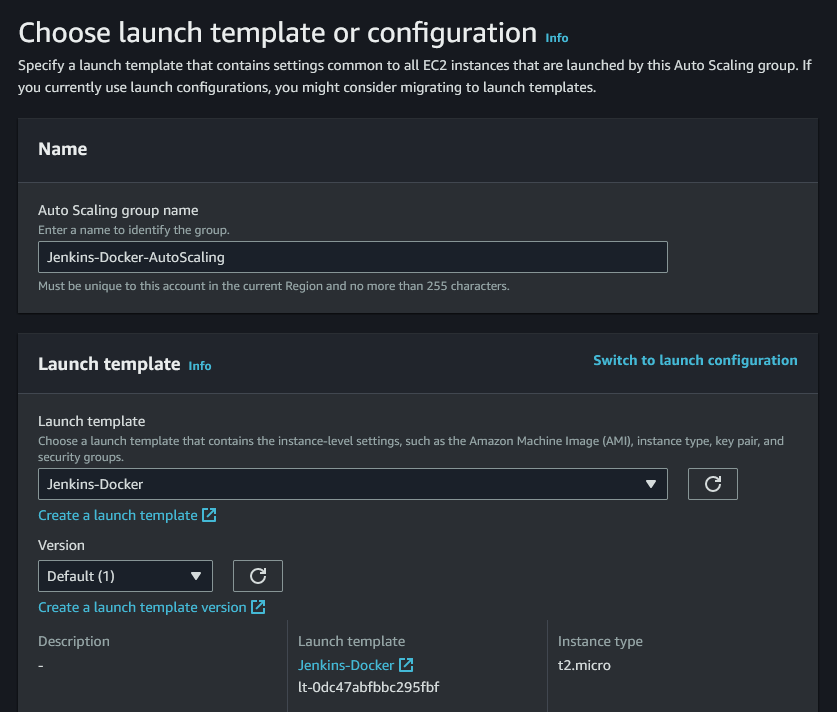
Before creating an Auto-Scaling Group, ensure you have a launch template or configuration that defines the instance type, AMI, and other settings you want for your instances. You can follow the steps mentioned earlier to create a launch template.
Step 2: Access the Auto Scaling Dashboard:
Sign in to your AWS account.
Go to the AWS Management Console.
In the AWS Management Console, navigate to the EC2 Dashboard.
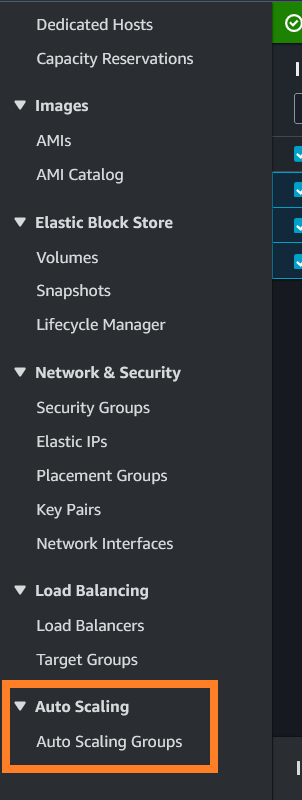
Under the "Auto Scaling" section in the left sidebar, click on "Auto Scaling Groups."
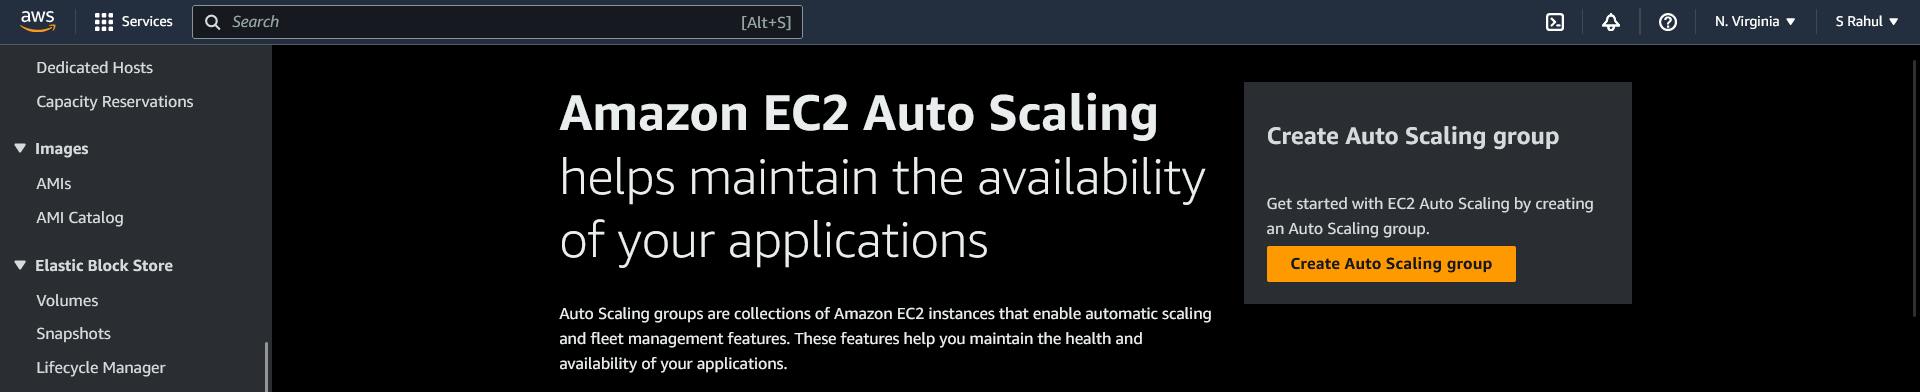
Step 3: Create an Auto-Scaling Group:
Click the "Create Auto Scaling group" button.
Choose the launch template or configuration that you prepared in Step 1.
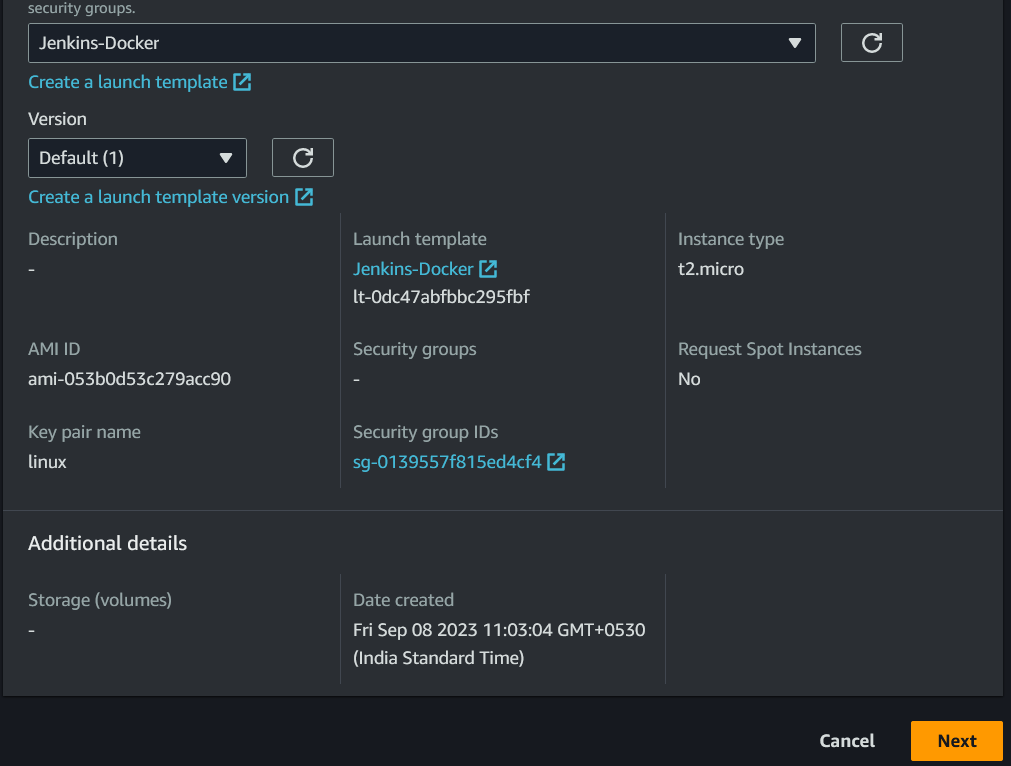
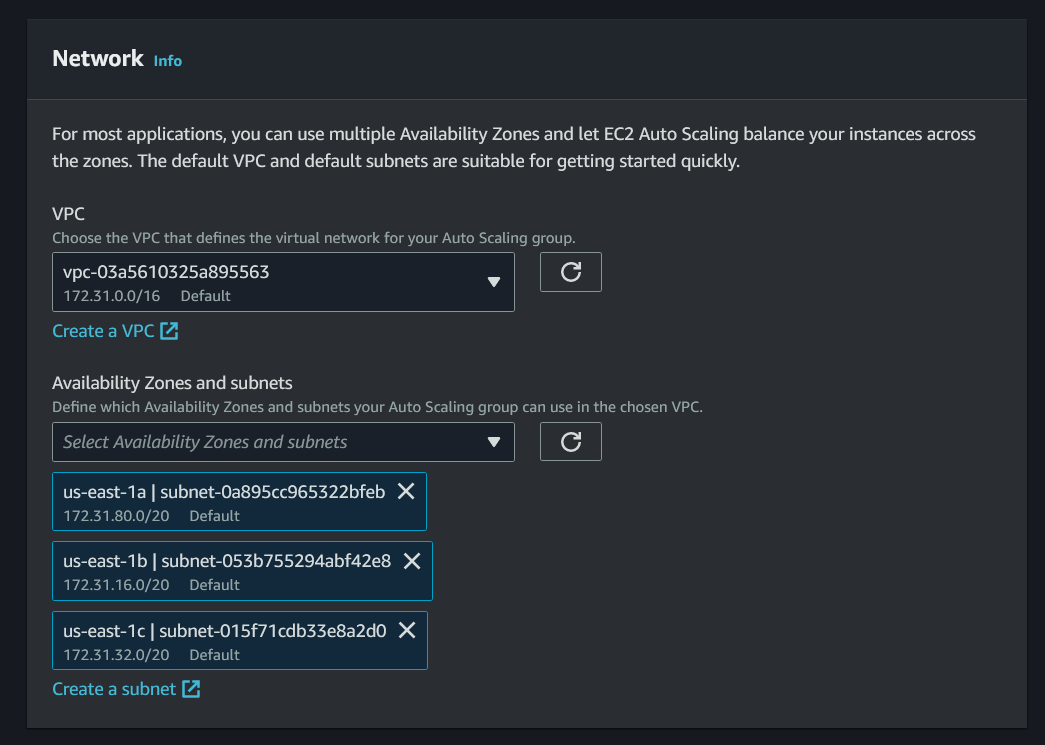
Network Configuration :
Select the VPC and availability zone your auto-scaling group can use in the chosen VPC
Configure Load Balancing (Optional):
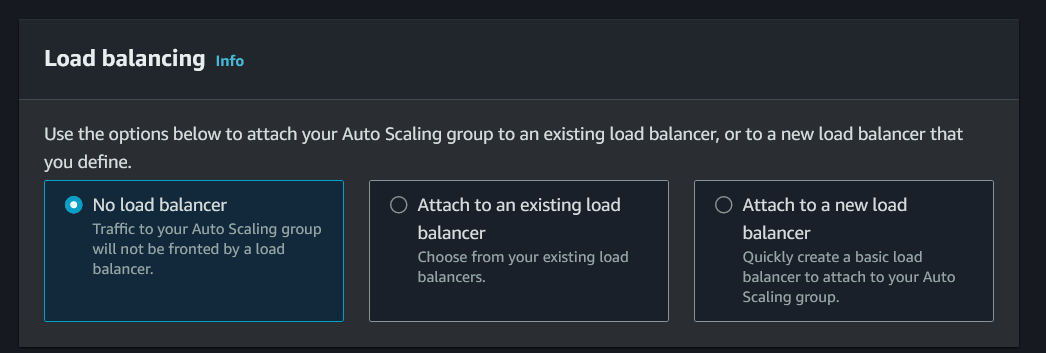
If your application requires load balancing, you can integrate an Elastic Load Balancer (ELB) or an Application Load Balancer (ALB) with your Auto-Scaling Group. This ensures that incoming traffic is distributed evenly across your instances.
Under "Load balancing," select your load balancer or create a new one.
Configure the health check settings to determine when instances are considered healthy or unhealthy.
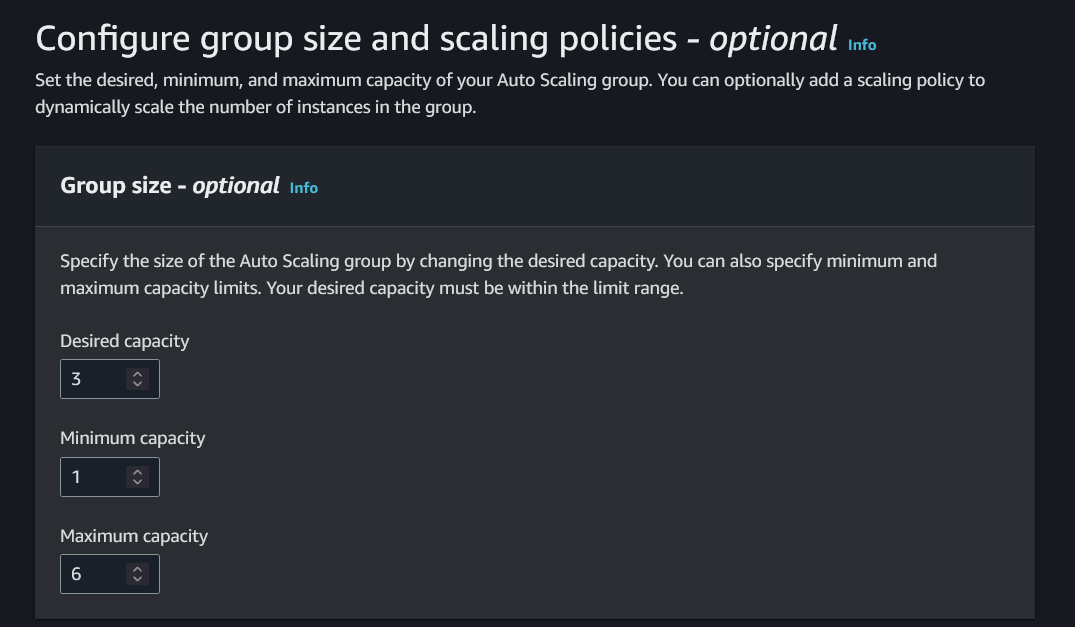
Configure the group size:
Set the desired capacity, which is the initial number of instances you want in the group.
Define minimum and maximum instance counts to control scaling behaviour.
Step 6: Configure Notifications (Optional):
You can set up email or SMS notifications to alert you when the Auto-Scaling Group scales up or down or when there are other events.
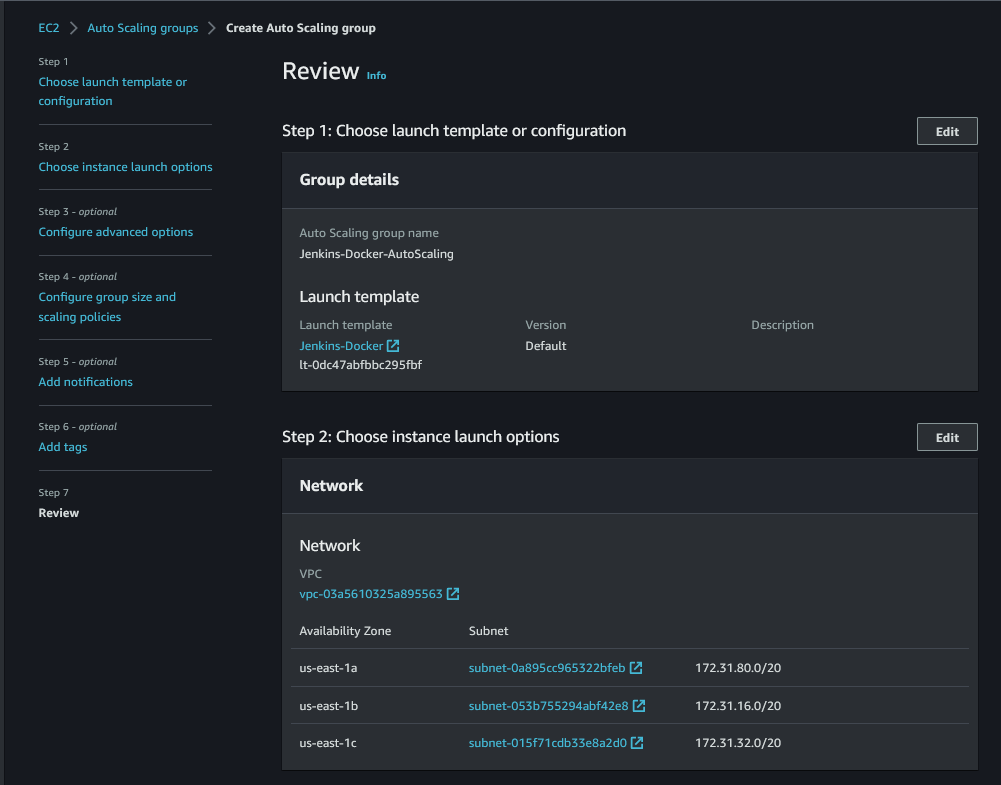
Step 7: Review and Create the Auto-Scaling Group:
Review all the configuration settings you've made.
Click the "Create Auto Scaling group" button to create the group.

Step 8: Monitor and Adjust:
After creating the Auto-Scaling Group, monitor its performance and adjust scaling policies as needed. You can fine-tune policies to optimize resource utilization and ensure your application's availability and performance.
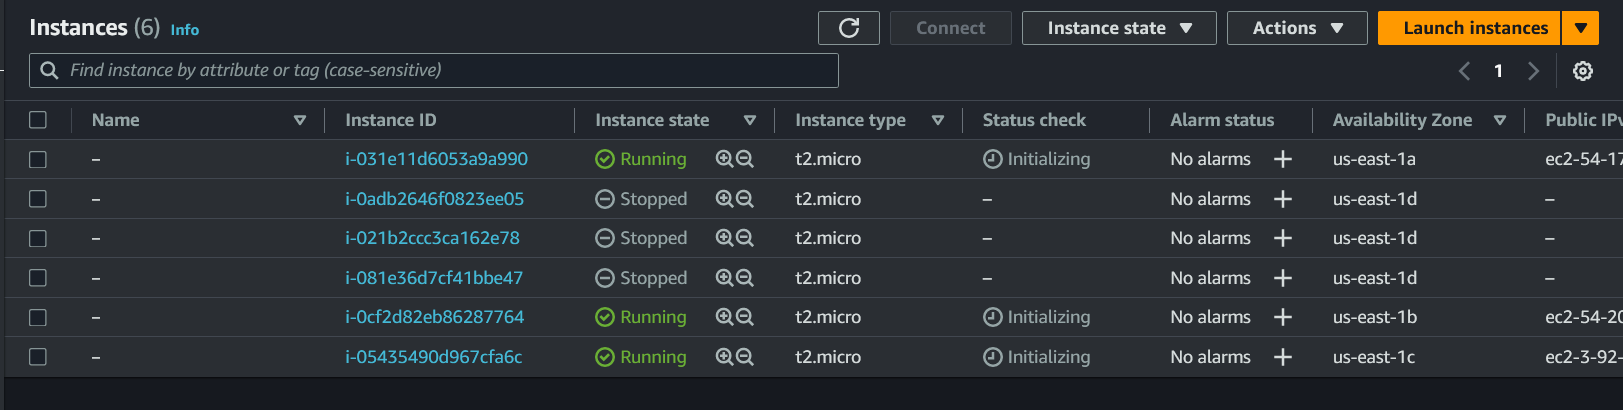
I hope You understood the concept of creating templates and auto scaling.
Happy Learning :D